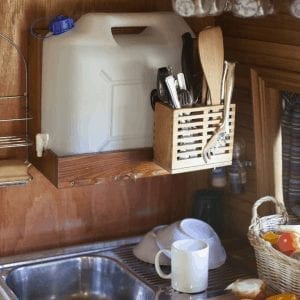
Looking for campervan sink ideas? If you’re a beginner to the business, like me (before my van conversion the most DIY I did was painting a set of draws) you’ve come to the right place. Even if you know what you’re doing and you’re looking for inspiration you’ve come to the right place. Below, I share 3 easy campervan sink ideas to help you get started on that conversion dream!
First things first. With a DIY van sink you can go as expensive or as bundy as you like. It all depends on your budget, patience and space. The great thing is you really don’t have to spend a lot of money to get a quality campervan sink, even for that self contained sticker!
My partner and I wanted a traditional looking diy sink for a small price. So we went with a steel bowl from Briscoes for $8. That was the easy part. Fitting the thing together was tricky as we had absolutely no idea what plumbing essentials we needed! We ended up walking out of Mitre10 with a heap of random stuff and returning most of it…
But I don’t want you to do that! So here are some campervan sink ideas for you!
Campervan sink ideas option 1
What you will need:
- A metal or plastic bowl $5-$8 (From Briscoes, Warehouse, Kmart, anywhere really- Preferably one with a lip).
- Hand pump from SuperCheapAuto for around $39.
- Waste basin and plug from Mitre10 $26. (The plug was terrible so we brought a rubber one for $4).

- Tubing from Mitre10 (Technically the tube is for washing machines) $18
- Tanks from SuperCheapAuto $20 each
- Reducing socket $8
- Sealant and gun $12Total cost (after we returned items): $151


 Total cost (after we returned items): $151
Step 1:
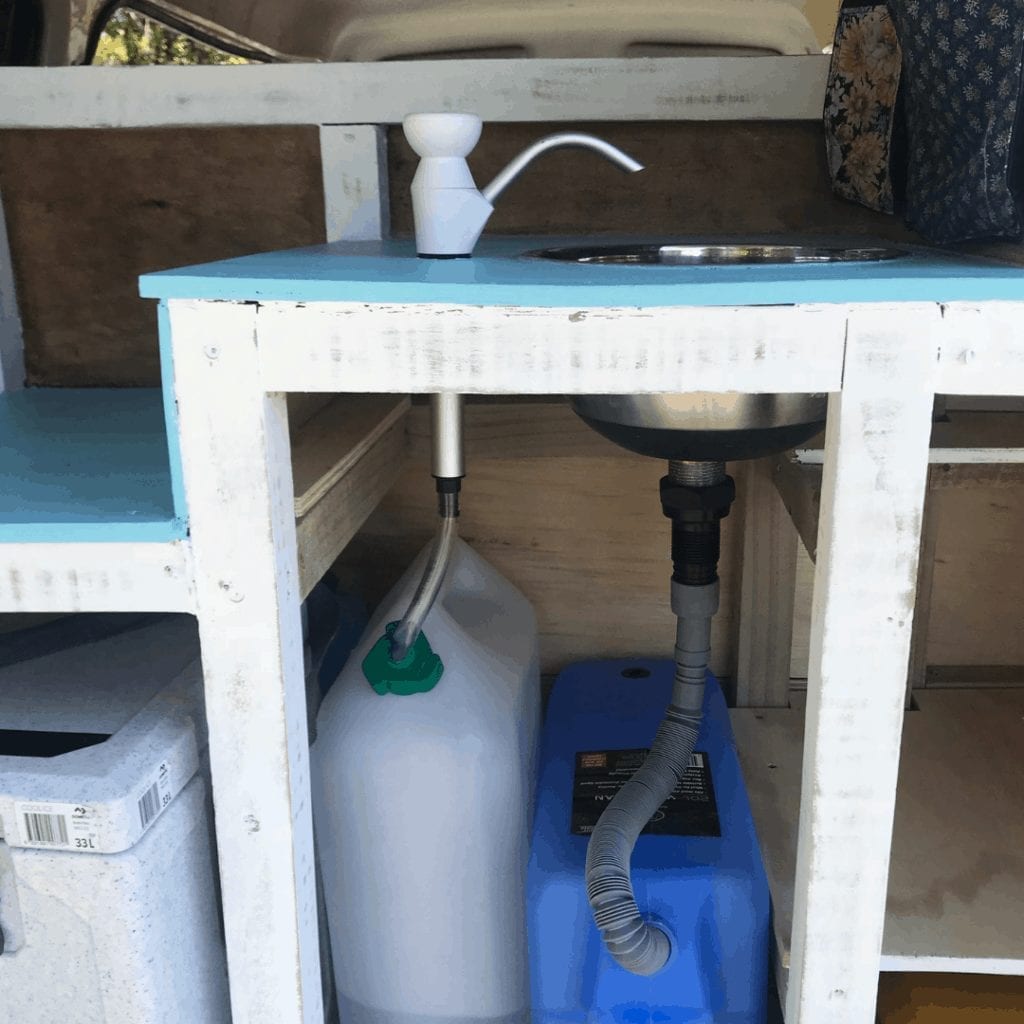
Hopefully, you know exactly where your sink is going in your campervan! It is essential to know if the tubing will reach your tanks and have enough room to drain properly.
With your steel bowl measure the circle you are going to cut for your sink hole and cut around it. We used a jigsaw that had steel blades. It took a while to get the hole perfectly round but with a bit of sanding, it was fine.
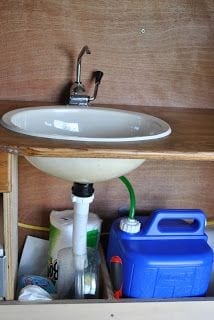
Once the hole is cut, grab your sealant and waste basin and run it around the circle edge of the bowl and basin. You want to put the basin in the hole and secure it tight to seal overnight.
The sink basin will come with a bolt that screws up from underneath. Make sure this is as tight as possible! It will help prevent leakage. Also, remember to put the clear ring that comes with the basin on the top side of the bowl, not the bottom.
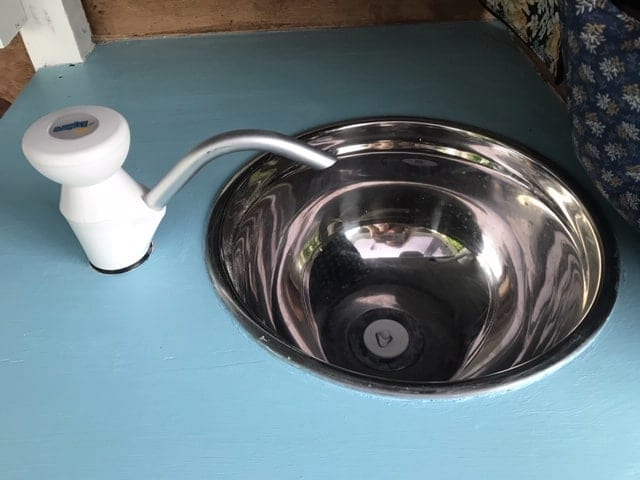
Now, cut a hole with a jigsaw in your piece of wood/bench, just big enough for your bowl to slide in. Do the same for your hand pump. Make sure the hole is smaller rather than larger because you can easily sand away, it’s not so easy to add wood!
One thing to note: Get a bowl with a lip makes this stage easier as you have a natural seal securing the bowl in the hole.
Step 2:
Once everything is sitting perfectly you will need to connect your tubing to the sink. We used a random connection called a reducing socket found in the plumbing department of Mitre10. It was big enough to screw into the waste basin and small enough at the other end to fit the tubing.
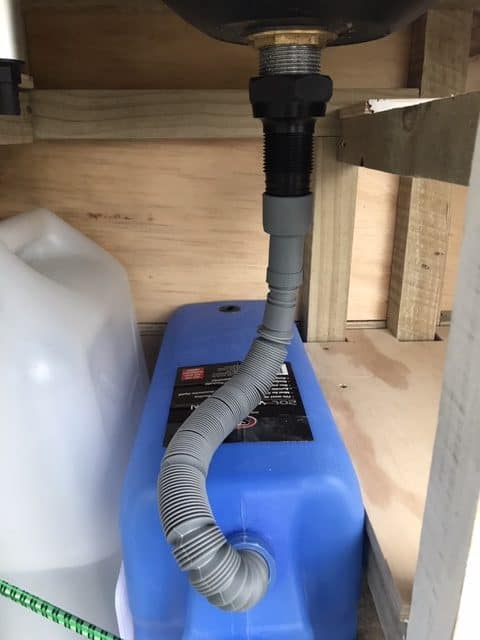
Next, connect your flexible drain hose (your tubing) to the basin. Mitre10 have quite a few different sizes so hopefully, you can find one that fits your connection. (We originally brought the stiff clear tubing but that was an epic fail as it had no give!).
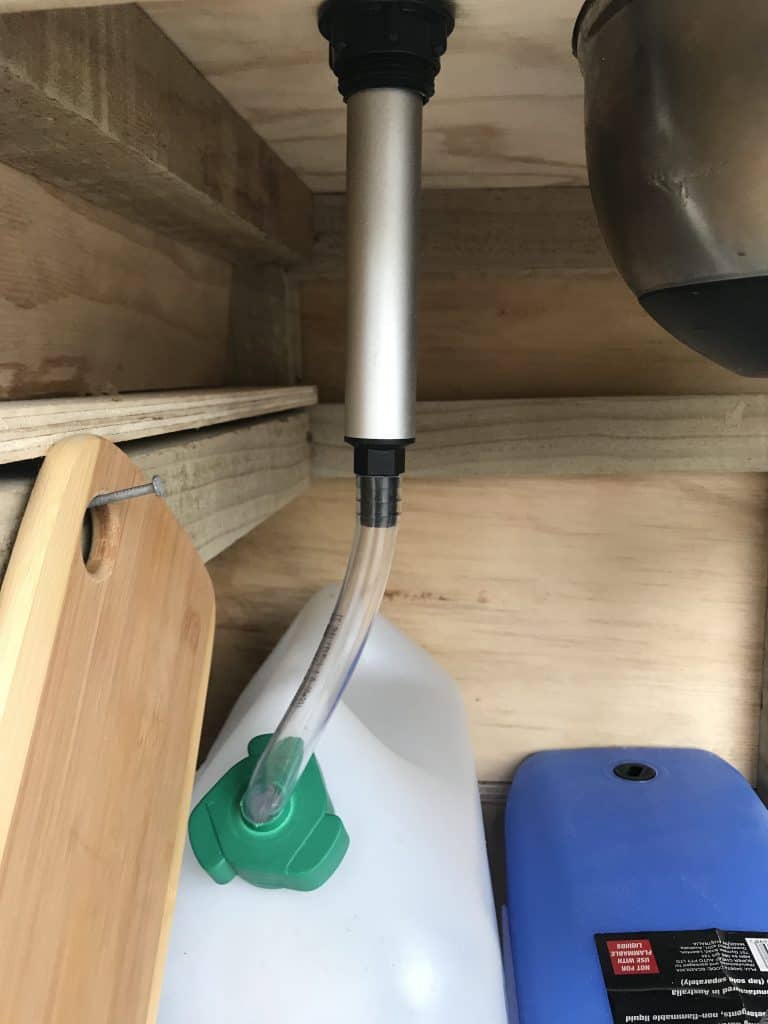
The tubing for our hand pump was a little trickier because it didn’t have as much bend. But, it was small enough to do the trick. We didn’t use any sealant on the tubing as we needed to remove the tanks from them to empty the water, we just cut a hole in the lid of the tank to prevent spillage.
The tubing from the basin to the waste water connects like a glove so we didn’t need any sealant either.
What to remember: The basin will only stick if you have good sealant and enough pressure tightening it together. Also, don’t make the hole that you cut in your wood/bench too big for the bowl to fit! You want it to be very snug.
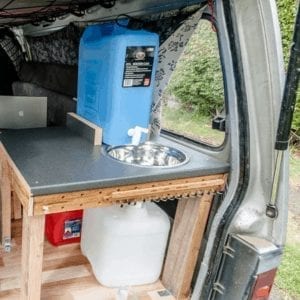
Campervan sink idea 2
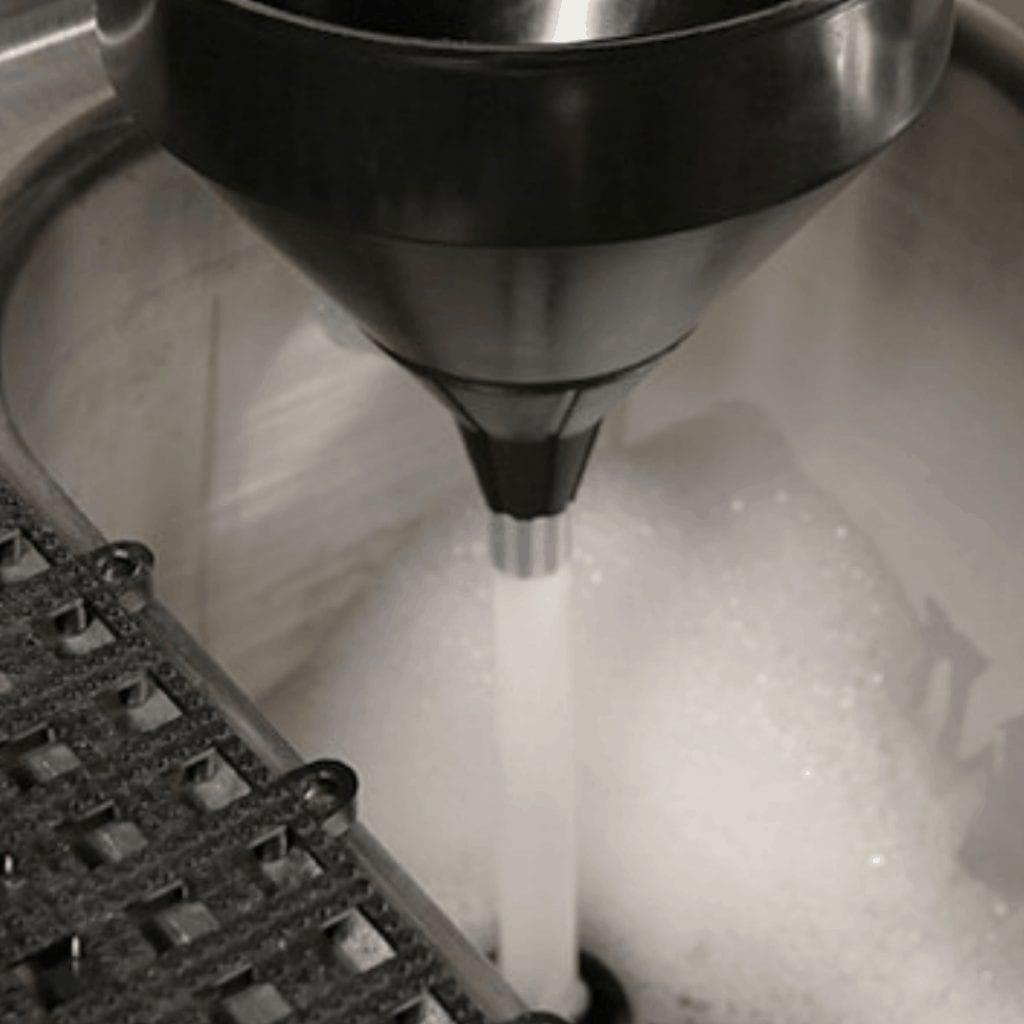
Use a funnel.
You could use a bowl and a funnel or simply use the funnel on its own. Then add the funnel directly to the tank or add an extra piece of tubing.
Check out elementvanlife’s video here who takes you through his set up!
You don’t even need to have a hand pump for this one, you could just put a water tank at the top like this…
I would say this idea would cost you a maximum of $188 (all of the items listed below) and a minimum of $65 (tanks, bowl, sealant, funnel).
- Tanks $40
- Funnel $5-10
- Hand Pump- If you want it, $39
- Waterproof tape/ duct tape $5-$20
- Bowl $5-8
- Waste basin (If you want it, you could just drill holes!) $26
- Trap $10-$30
- Sealant and gun: $15
Campervan sink idea 3
Water trap and proper fittings.
If you’re looking at getting that self-contained sticker for your van then this is the type of connection you would want to aim for…
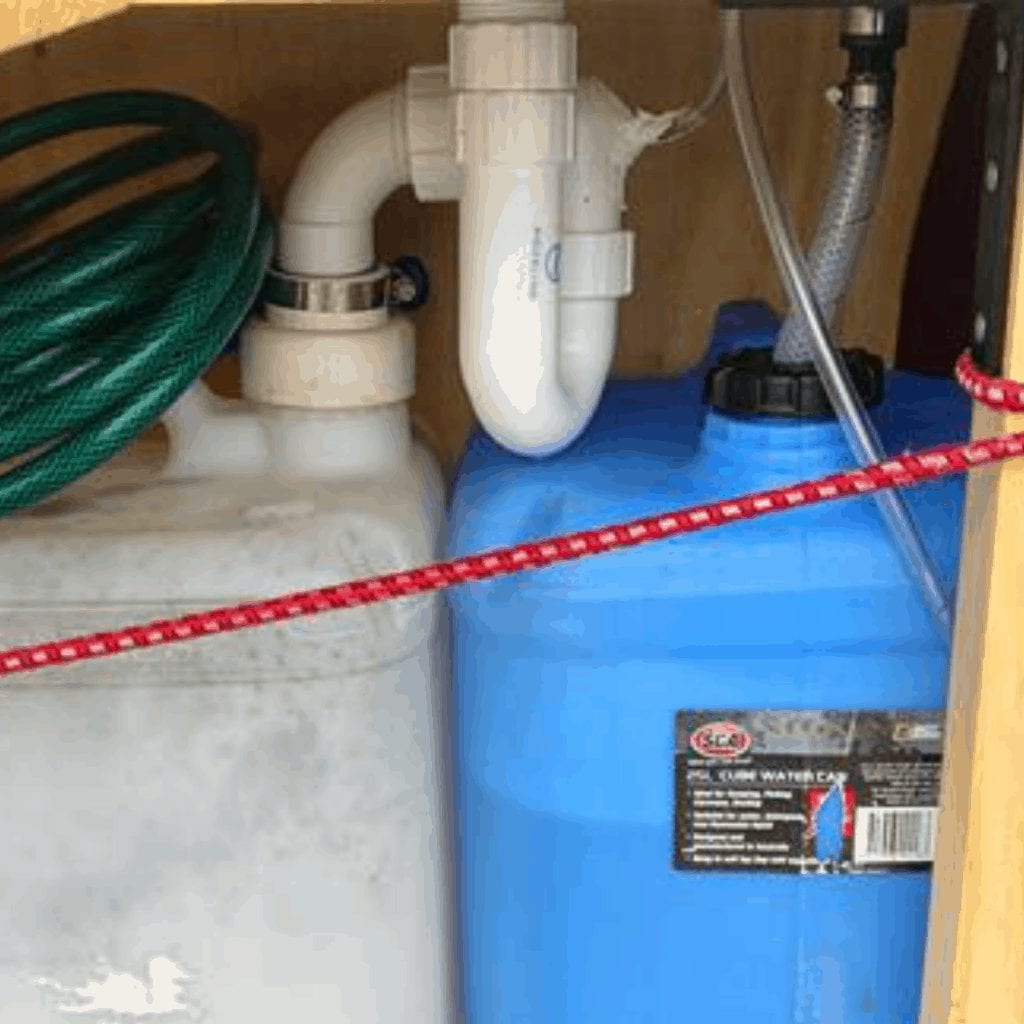
I wish I could help you guys a little more with this type of connection but this area is rather foreign to me! So, I hope the photos give you some inspiration if my description is not clear enough!
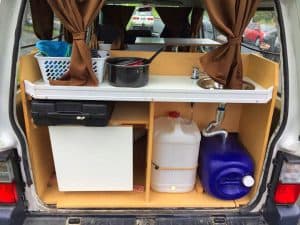
Remember to get the self contained sticker you will need to add a vent that is 10mm in diameter (minimum). It needs to run from your waste tank up past your sink and then back down outside the van.
A campervan store would be your first point of call for proper connections but Mitre10 and Bunnings seem to sell a heap of traps with connections. I would suggest taking in photos like this and describing to the people in the store what kind of fittings you need and the size of your tank lid.
Otherwise, just make sure you are getting a) the trap connection water tight and attached to your basin b) a connection from the trap to fit securely around your tank) and c) the same for the fresh water.
The most important thing is that your sink is watertight!
Remember: To make sure you are aware of how much space you have to build the sink and have enough height for the trap to work!
I know traps cost around $25 but I’m not sure if you would need to get extra connections to attach to your water tanks. I would say the cost for this type of sink including tanks would be no more than: $180
- Tanks: $40
- Trap $25
- Hand pump (if you want it) $39
- Vent, if you want to get a self contained sticker (plastic tubing from Bunnings) $15
- Bowl $5-8
- Waste basin $26
- Tube from water tank to hand pump: $10
- Sealant and gun $15
There you have it. A short and simple post for anyone out there struggling for camper sink ideas. I hope you find the post useful! I would love to hear your comments/ questions or tips on your campervan build below!
Loved this post on 3 campervan sink ideas? Pin the image below for later!

Other articles you will love:


Leave a Reply